GotSafety Desktop Admin – Adding Employees
For your employees to be able to sign off electronically on safety lessons, My Learning lessons, and submit forms, you must add employees into the admin portal.
1 – Navigating to the Add Employee Tab
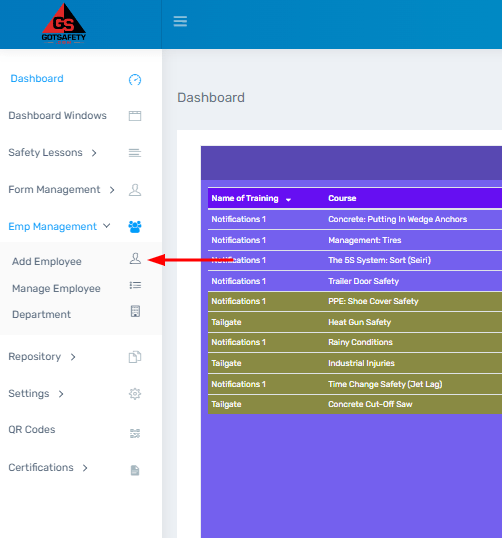
- From “Dashboard”, click “Emp Management”.
- From the drop-down menu, select “Add Employees”.
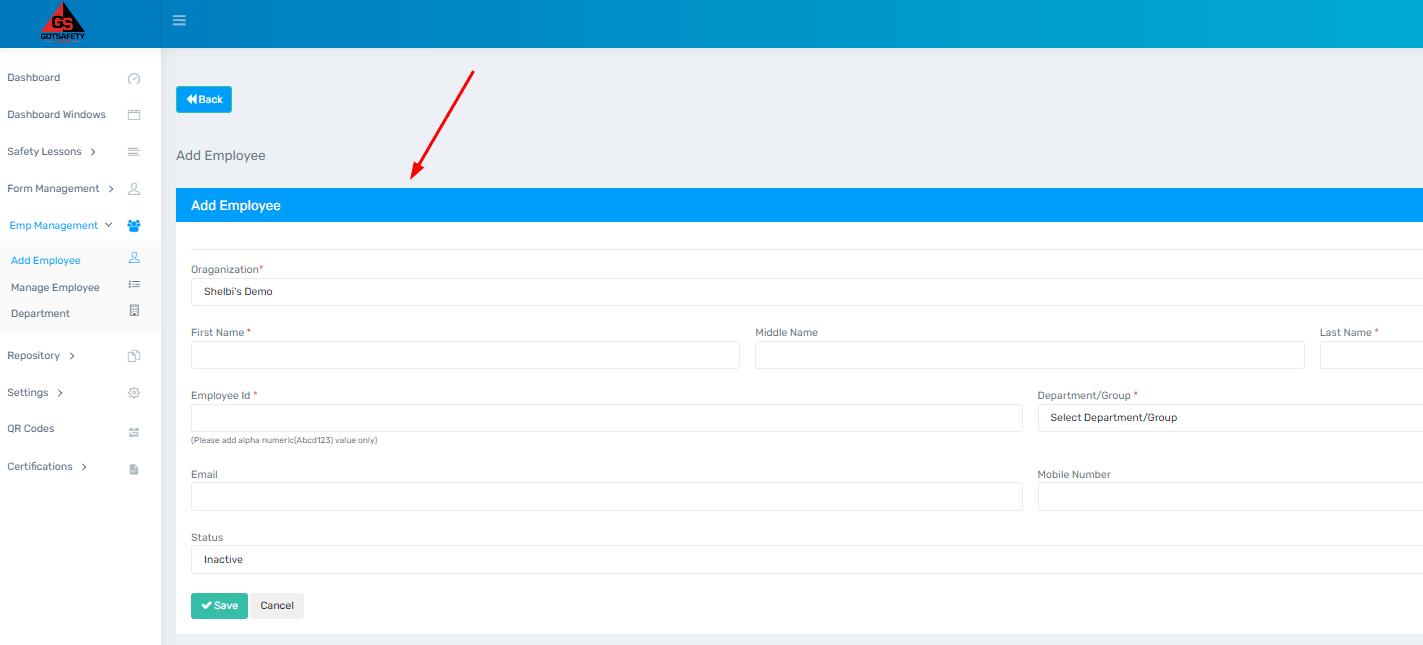
- This will open a fillable page to add employee information.
2 – Enter Employee Information
- Everything that has a red asterisk on the “Add Employee” page must be filled out. This includes “First Name”, “Last Name”, “Employee ID”, and “Department/Group”. An “Employee ID” can be up to 10 characters long, but must not contain any special characters, including dashes.
- The “Middle Name”, “Email” and “Mobile Number” fields are optional.
- “Email” and “Mobile Number” will be used if you want your employee to receive notifications that a scheduled training is due or if certifications are about to expire. If you enter in a mobile number, do not enter any special characters between the numbers, including dashes and parentheses.
- Change “Inactive” to “Active” at the bottom of the page.
- Once filled out, click “Save”.
- This will take you to the “Manage Employee” tab.
3 – Manage Employee Tab
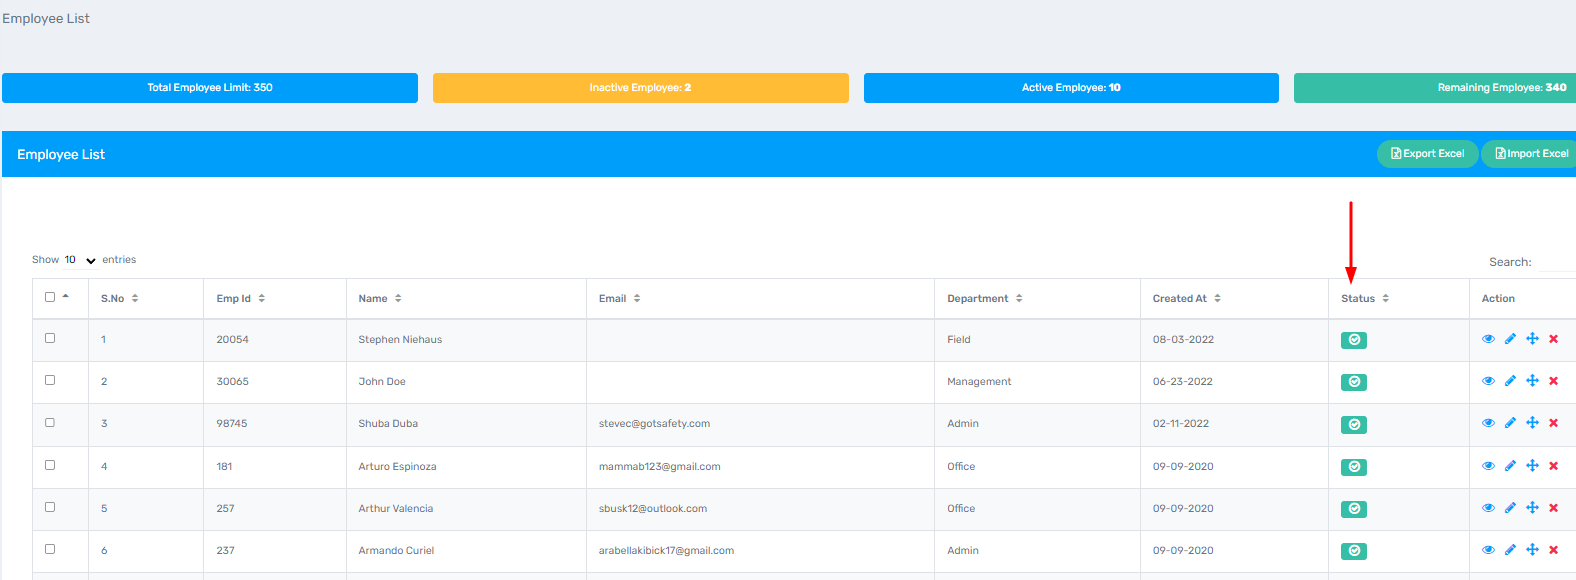
On this page, you can see all the employees currently in your system. If you need to get here from the main menu, click on the “Emp Management” tab and then select “Manage Employee”.
Deactivating Employees and Editing Information
- You can inactivate employees by clicking the green box under “Status”.
- After clicking the green box, it will ask if you want to inactivate, click “OK”.
- The box will now be yellow, indicating that the employee is inactive.
- To inactivate multiple employees at once, select the checkbox to the left of the employee’s names that need to be inactive, and scroll to the bottom of the page and click “Deactivate”.
- To edit an employee’s information, click on the pencil icon to the right of the employee. This will open the employee’s information so you can edit the name, ID number, department and add/remove an email or phone number.
- If you need to change the department of multiple employees at once, select the checkbox to the left of the employee’s names that need to be changed, and click “Change Department”. A box will pop-up that reads “Transfer Employee to Other Department”. Click the “Select Department” box and choose the department the employees will be changed to. Once chosen, click “Save”.
- If you need to search for a specific employee or department, you can use the “Search” bar at the top right corner, above the “Action” column. Simply type in the employee’s name, ID number, or department they are in. The system will filter automatically.
- WARNING: IF YOU DELETE AN EMPLOYEE USING THE RED “X” ICON, YOU LOSE ALL OF THE RECORDS ASSOCIATED WITH THAT EMPLOYEE.


